aerial hoops

Aerial Hoop (Lyra)

Frequently Asked Questions

About Aerial Hoops

1. Is This Hoop Safe?

Yes. The hoop meets the requirements of PN-EN 913+A1:2022-02 for gymnastic equipment safety and testing. Single-point hoops are additionally tested and certified by TÜV Nord.

Key safety features

  • min. 1-tonne breaking strength
  • Safe working load: up to 143 kg
  • 27 mm steel tubing with 3 mm wall thickness
  • Tested by professional aerial schools
  • Suitable for beginners, intermediate, and advanced users

Always use the hoop with correctly rated rigging equipment and professional installation.

2. What Equipment Do I Need Besides The Hoop?

Minimum items to get started safely:

Essential:

  • ceiling mount (heavy-duty, load-rated)
  • crash mat (at least 5% of suspension height thick)
  • safe practice space (clear floor area with spotter)
  • rigging hardware: carabiner, round sling or adjustable strap (for easy height changes)

Optional:

  • swivel
  • velvet sling
  • freestanding rig (if you can’t install ceiling mount)

3. What Do I Need To Install a Hoop At Home?

To install an aerial hoop safely, you will need:

  • A concrete ceiling, structural steel or wooden beam, suitable wooden joists, or a professional aerial rig capable of supporting at least 500 kg per attachment point.
  • Proper ceiling anchors, hooks, or a rigging plate designed and rated for dynamic loads.
  • Locking carabiners rated to at least 22 kN.
  • A strop or extension strap, if needed to adjust the hanging height.
  • A structural engineer’s assessment to confirm that the installation point can safely withstand the expected dynamic forces.

Never install an aerial hoop on a suspended ceiling, plasterboard, false ceiling, or an unverified structural element.

4. How Do I Install an Aerial Hoop?

Aerial hoop rigging must be installed only on a verified structural anchor point or a purpose-built aerial rig. If there is any doubt about the ceiling, beam, fixings, or equipment, use a qualified aerial rigger or structural engineer. Professional aerial-sports guidance likewise recommends competent riggers for human-load equipment.

Basic rigging order
From the ceiling or rig down:

  1. Certified ceiling mount or freestanding aerial rig
  2. Locking carabiner
  3. Aerial swivel, if spinning is required
  4. Rated round sling or extension strap
  5. Second locking carabiner
  6. Aerial hoop

A swivel is optional, but it allows the hoop to rotate freely and should never be blocked when in use.

Before training

  • Check that every carabiner is fully closed and locked.
  • Inspect the mounting point, hoop, slings, swivel, and connectors before every use.
  • Place a suitable aerial crash mat directly beneath the hoop.
  • Test the setup gradually before using it for full training.
  • Never train alone; use a qualified instructor or spotter, especially when learning new skills.
  • Do not use unverified DIY ceiling fixings, suspended ceilings, or ordinary household hardware.

For home installations, a professional assessment of the structure and rigging point is strongly recommended.

5. What Is the Right Hoop Size for Me?

Choose your hoop size using one of the measurement methods below. For the most comfortable fit, base your choice on your own measurements rather than height alone.

How to measure:

  • Standing measurement: Measure from the top of your hip to the floor. Add 5 cm and round up to the nearest available hoop size.
  • Seated measurement: Sit upright on a chair and measure from the seat to the top of your head. Add 12–15 cm and round up to the nearest available hoop size.

Available hoop sizes
75 | 80 | 85 | 90 | 95 | 100 | 105 | 110 cm

Suggested sizes by height

Hoop size Suggested user height
110 cm 180 cm and above
105 cm 172–180 cm
100 cm 164–172 cm
95 cm 156–164 cm
90 cm 148–156 cm
85 cm 135–148 cm
80 cm 125–135 cm
75 cm Under 125 cm

Note: These height ranges are general recommendations only. For the best fit, always choose the size based on your personal measurements.

6. Which Handle Option Should I Choose?

Choose the hoop style based on your experience, preferred movements, and whether you want more rotation or more stability.

Hoop style Key features Best for
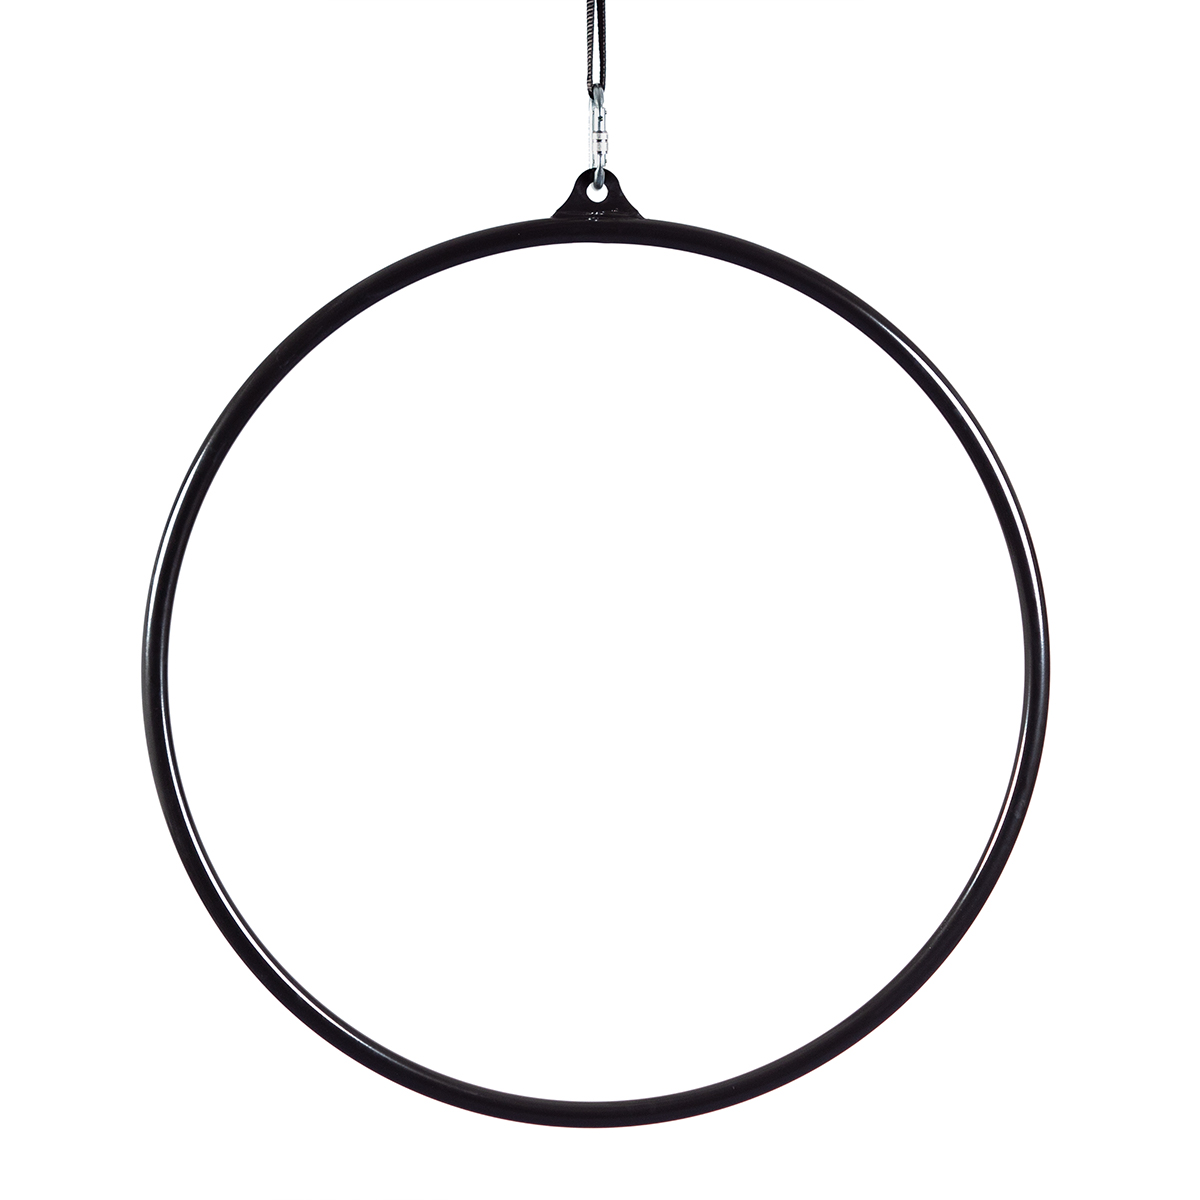
Single-point hoop One attachment point at the top. Rotates freely when used with a swivel and is the most versatile option for general aerial training. Beginners and all-round training
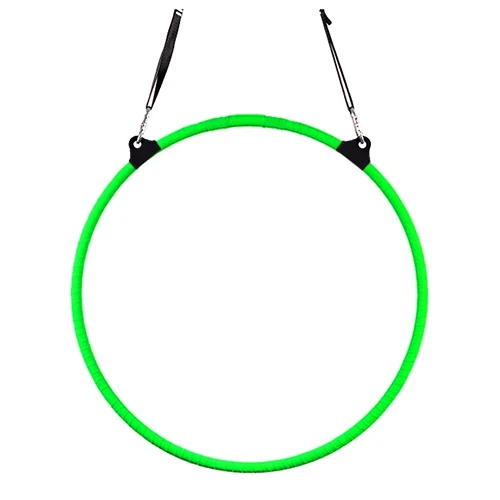
Double-point hoop Two attachment points provide greater stability and control. The hoop has less free rotation, making it useful for certain poses, transitions, and routines. Intermediate aerialists who prefer more control
Zero-point hoop No built-in attachment points; the rigging strap wraps directly around the hoop. This setup offers fluid movement and can rotate freely when correctly rigged with a swivel. Advanced aerialists with strong technique and rigging knowledge

Recommendation: For a first aerial hoop, a single-point hoop is usually the most versatile and beginner-friendly option.

7. Do I Need a Taped or Untaped Aerial Hoop?

Taped hoops

Benefits:

  • Enhanced grip — extra friction helps you maintain a secure hold, even with sweaty hands.
  • Better control during dynamic movements.
  • Protective padding — tape adds cushioning and can reduce pressure on the hands, wrists, and body.
  • Ideal for moves requiring a strong grip, such as ankle hangs, foot hangs, heel hangs, and neck hangs.
  • Best for most aerialists, especially those practising challenging positions or drops.

Things to consider:

  • More maintenance is required — the tape can wear over time and may need replacing every 1–2 years, depending on use.
  • New tape may feel sticky at first and can leave slight adhesive residue. Dusting it with chalk may help reduce stickiness.
  • Tape friction on bare skin can take time to get used to.
  • Protective clothing may help prevent friction burns and calluses on the hands, wrists, and legs.

Untaped hoops

Benefits:

  • A smoother feel on the hands and skin, especially for burlesque or performance-style training.
  • Less friction on bare skin during regular contact with the hoop.
  • Gentler on the hands and may cause fewer calluses than a taped hoop.
  • Easier to clean, with no tape to maintain or replace.
  • Best for performances with exposed skin, aerial dance, and burlesque-style movements.

Things to consider:

  • Lower grip compared with a taped hoop.
  • Some moves, including neck hangs, heel hangs, and foot hangs, may be more difficult and require greater control.
  • Sweaty hands can make the hoop harder to grip.
  • More grip strength and experience may be needed for dynamic movements.

Not sure which option to choose? Speak to your instructor or try both styles where possible. Many aerialists prefer taped hoops for regular training, while untaped hoops are often chosen for their smooth feel and appearance.

8. How Do I Tape My Aerial Hoop?

What You Need

  • High-quality aerial or athletic cloth tape
  • Scissors
  • Chalk
  • Rubbing alcohol or a suitable cleaning product

Before You Start

Clean the hoop thoroughly to remove dust, oil, and residue. Allow it to dry completely before applying the tape.

Taping Method

  1. Start at the bottom of the hoop.
  2. Wrap the tape upwards in a slight spiral, overlapping each layer by approximately one-third of the tape width.
  3. Continue to the top of the hoop.
  4. Start again at the bottom and tape the other side in the opposite direction until you reach the top.

This two-part method is preferred by many aerialists because it helps prevent the tape from rolling or lifting at the edges during use.

After Taping

  • Keep the tape under gentle tension and smooth it as you wrap to avoid wrinkles and air bubbles.
  • Lightly dust new tape with chalk if it feels sticky. Excess adhesive can sometimes come through the cloth tape, especially when it becomes warm during training.
  • Inspect the tape regularly and replace it if it becomes loose, worn, dirty, uneven, or starts peeling.

9. Maintance: How Do I Keep My Hoop Safe?

Regular inspections and proper care are essential for safe aerial hoop training.

Before Each Practice

  • Check all carabiners, connectors, and rigging hardware for visible damage.
  • Inspect the carabiners, swivel, ceiling mount, and attachment points for cracks, deformation, corrosion, sharp edges, or excessive wear.
  • Do not use the hoop or rigging equipment if any damage, unusual movement, or wear is found. Replace the affected item or have it inspected by a qualified professional.

Regular Care

  • Wipe the hoop down after each practice to remove sweat, chalk, and hand residue.
  • Store it indoors in a dry place.
  • Check the hoop regularly for scratches, dents, cracks, or rust spots.
  • Inspect the attachment points where the rigging hardware connects to the hoop.

With regular inspection and simple care, the hoop can remain in good condition for many years of training.

10. Can I Return It If It Doesn’t Work Out?

Yes. You have a 14-day right to return your order and receive a refund.

Return Conditions

  • You may return the product within 14 days of receiving it.
  • The product may be inspected and handled only as necessary to check its nature, characteristics, and function—just as you would in a physical shop.
  • If the equipment shows signs of use, wear, marks, damage, or other handling beyond what is necessary for inspection, its value may be reduced.
  • To start a return, simply contact us by email.
  • Return shipping costs may apply, depending on the return policy and the reason for the return.

Aerial Hoop (Lyra)

Frequently Asked Questions

About Aerial Hoops

1. Is This Hoop Safe?

Yes. The hoop meets the requirements of PN-EN 913+A1:2022-02 for gymnastic equipment safety and testing. Single-point hoops are additionally tested and certified by TÜV Nord.

Key safety features

  • min. 1-tonne breaking strength
  • Safe working load: up to 143 kg
  • 27 mm steel tubing with 3 mm wall thickness
  • Tested by professional aerial schools
  • Suitable for beginners, intermediate, and advanced users

Always use the hoop with correctly rated rigging equipment and professional installation.

2. What Equipment Do I Need Besides The Hoop?

Minimum items to get started safely:

Essential:

  • ceiling mount (heavy-duty, load-rated)
  • crash mat (at least 5% of suspension height thick)
  • safe practice space (clear floor area with spotter)
  • rigging hardware: carabiner, round sling or adjustable strap (for easy height changes)

Optional:

  • swivel
  • velvet sling
  • freestanding rig (if you can’t install ceiling mount)

3. What Do I Need To Install a Hoop At Home?

To install an aerial hoop safely, you will need:

  • A concrete ceiling, structural steel or wooden beam, suitable wooden joists, or a professional aerial rig capable of supporting at least 500 kg per attachment point.
  • Proper ceiling anchors, hooks, or a rigging plate designed and rated for dynamic loads.
  • Locking carabiners rated to at least 22 kN.
  • A strop or extension strap, if needed to adjust the hanging height.
  • A structural engineer’s assessment to confirm that the installation point can safely withstand the expected dynamic forces.

Never install an aerial hoop on a suspended ceiling, plasterboard, false ceiling, or an unverified structural element.

4. How Do I Install an Aerial Hoop?

Aerial hoop rigging must be installed only on a verified structural anchor point or a purpose-built aerial rig. If there is any doubt about the ceiling, beam, fixings, or equipment, use a qualified aerial rigger or structural engineer. Professional aerial-sports guidance likewise recommends competent riggers for human-load equipment.

Basic rigging order
From the ceiling or rig down:

  1. Certified ceiling mount or freestanding aerial rig
  2. Locking carabiner
  3. Aerial swivel, if spinning is required
  4. Rated round sling or extension strap
  5. Second locking carabiner
  6. Aerial hoop

A swivel is optional, but it allows the hoop to rotate freely and should never be blocked when in use.

Before training

  • Check that every carabiner is fully closed and locked.
  • Inspect the mounting point, hoop, slings, swivel, and connectors before every use.
  • Place a suitable aerial crash mat directly beneath the hoop.
  • Test the setup gradually before using it for full training.
  • Never train alone; use a qualified instructor or spotter, especially when learning new skills.
  • Do not use unverified DIY ceiling fixings, suspended ceilings, or ordinary household hardware.

For home installations, a professional assessment of the structure and rigging point is strongly recommended.

5. What Is the Right Hoop Size for Me?

Choose your hoop size using one of the measurement methods below. For the most comfortable fit, base your choice on your own measurements rather than height alone.

How to measure:

  • Standing measurement: Measure from the top of your hip to the floor. Add 5 cm and round up to the nearest available hoop size.
  • Seated measurement: Sit upright on a chair and measure from the seat to the top of your head. Add 12–15 cm and round up to the nearest available hoop size.

Available hoop sizes
75 | 80 | 85 | 90 | 95 | 100 | 105 | 110 cm

Suggested sizes by height

Hoop size Suggested user height
110 cm 180 cm and above
105 cm 172–180 cm
100 cm 164–172 cm
95 cm 156–164 cm
90 cm 148–156 cm
85 cm 135–148 cm
80 cm 125–135 cm
75 cm Under 125 cm

Note: These height ranges are general recommendations only. For the best fit, always choose the size based on your personal measurements.

6. Which Handle Option Should I Choose?

Choose the hoop style based on your experience, preferred movements, and whether you want more rotation or more stability.

Hoop style Key features Best for
Single-point hoop One attachment point at the top. Rotates freely when used with a swivel and is the most versatile option for general aerial training. Beginners and all-round training
Double-point hoop Two attachment points provide greater stability and control. The hoop has less free rotation, making it useful for certain poses, transitions, and routines. Intermediate aerialists who prefer more control
Zero-point hoop No built-in attachment points; the rigging strap wraps directly around the hoop. This setup offers fluid movement and can rotate freely when correctly rigged with a swivel. Advanced aerialists with strong technique and rigging knowledge

Recommendation: For a first aerial hoop, a single-point hoop is usually the most versatile and beginner-friendly option.

7. Do I Need a Taped or Untaped Aerial Hoop?

Taped hoops

Benefits:

  • Enhanced grip — extra friction helps you maintain a secure hold, even with sweaty hands.
  • Better control during dynamic movements.
  • Protective padding — tape adds cushioning and can reduce pressure on the hands, wrists, and body.
  • Ideal for moves requiring a strong grip, such as ankle hangs, foot hangs, heel hangs, and neck hangs.
  • Best for most aerialists, especially those practising challenging positions or drops.

Things to consider:

  • More maintenance is required — the tape can wear over time and may need replacing every 1–2 years, depending on use.
  • New tape may feel sticky at first and can leave slight adhesive residue. Dusting it with chalk may help reduce stickiness.
  • Tape friction on bare skin can take time to get used to.
  • Protective clothing may help prevent friction burns and calluses on the hands, wrists, and legs.

Untaped hoops

Benefits:

  • A smoother feel on the hands and skin, especially for burlesque or performance-style training.
  • Less friction on bare skin during regular contact with the hoop.
  • Gentler on the hands and may cause fewer calluses than a taped hoop.
  • Easier to clean, with no tape to maintain or replace.
  • Best for performances with exposed skin, aerial dance, and burlesque-style movements.

Things to consider:

  • Lower grip compared with a taped hoop.
  • Some moves, including neck hangs, heel hangs, and foot hangs, may be more difficult and require greater control.
  • Sweaty hands can make the hoop harder to grip.
  • More grip strength and experience may be needed for dynamic movements.

Not sure which option to choose? Speak to your instructor or try both styles where possible. Many aerialists prefer taped hoops for regular training, while untaped hoops are often chosen for their smooth feel and appearance.

8. How Do I Tape My Aerial Hoop?

What You Need

  • High-quality aerial or athletic cloth tape
  • Scissors
  • Chalk
  • Rubbing alcohol or a suitable cleaning product

Before You Start

Clean the hoop thoroughly to remove dust, oil, and residue. Allow it to dry completely before applying the tape.

Taping Method

  1. Start at the bottom of the hoop.
  2. Wrap the tape upwards in a slight spiral, overlapping each layer by approximately one-third of the tape width.
  3. Continue to the top of the hoop.
  4. Start again at the bottom and tape the other side in the opposite direction until you reach the top.

This two-part method is preferred by many aerialists because it helps prevent the tape from rolling or lifting at the edges during use.

After Taping

  • Keep the tape under gentle tension and smooth it as you wrap to avoid wrinkles and air bubbles.
  • Lightly dust new tape with chalk if it feels sticky. Excess adhesive can sometimes come through the cloth tape, especially when it becomes warm during training.
  • Inspect the tape regularly and replace it if it becomes loose, worn, dirty, uneven, or starts peeling.

9. Maintance: How Do I Keep My Hoop Safe?

Regular inspections and proper care are essential for safe aerial hoop training.

Before Each Practice

  • Check all carabiners, connectors, and rigging hardware for visible damage.
  • Inspect the carabiners, swivel, ceiling mount, and attachment points for cracks, deformation, corrosion, sharp edges, or excessive wear.
  • Do not use the hoop or rigging equipment if any damage, unusual movement, or wear is found. Replace the affected item or have it inspected by a qualified professional.

Regular Care

  • Wipe the hoop down after each practice to remove sweat, chalk, and hand residue.
  • Store it indoors in a dry place.
  • Check the hoop regularly for scratches, dents, cracks, or rust spots.
  • Inspect the attachment points where the rigging hardware connects to the hoop.

With regular inspection and simple care, the hoop can remain in good condition for many years of training.

10. Can I Return It If It Doesn’t Work Out?

Yes. You have a 14-day right to return your order and receive a refund.

Return Conditions

  • You may return the product within 14 days of receiving it.
  • The product may be inspected and handled only as necessary to check its nature, characteristics, and function—just as you would in a physical shop.
  • If the equipment shows signs of use, wear, marks, damage, or other handling beyond what is necessary for inspection, its value may be reduced.
  • To start a return, simply contact us by email.
  • Return shipping costs may apply, depending on the return policy and the reason for the return.

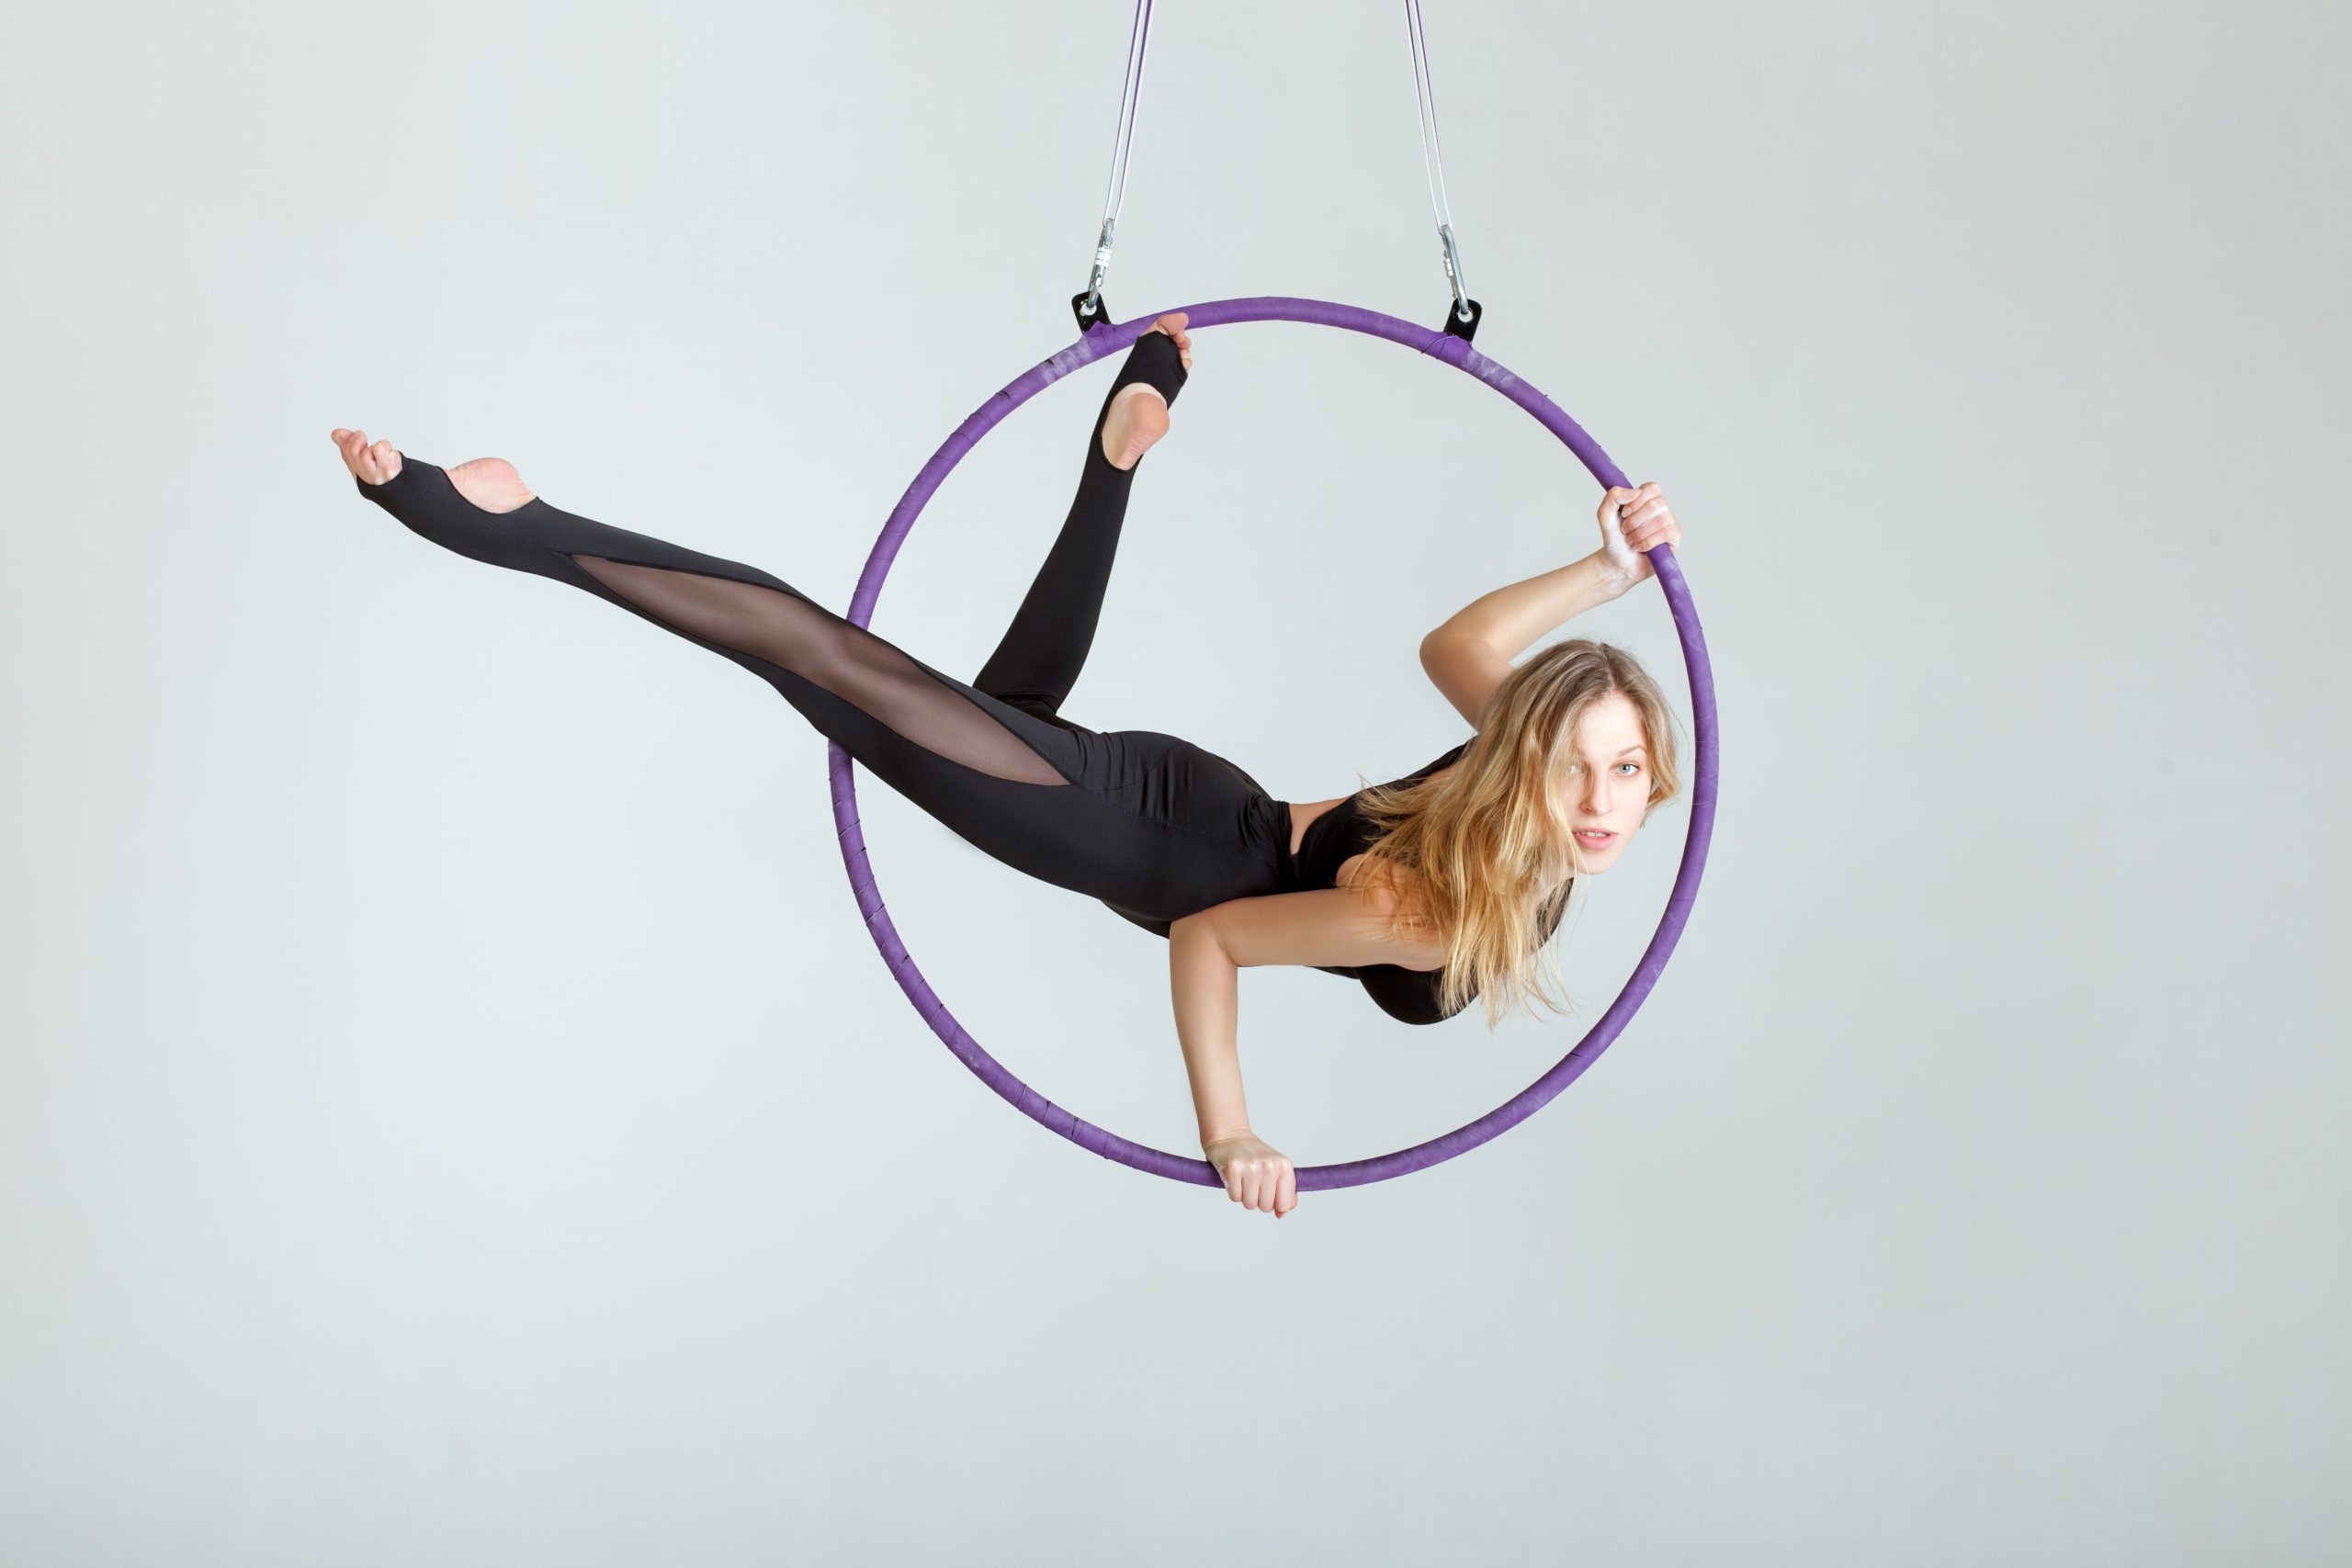
Aerial hoops, also known as lyra, are circular metal rings used in aerial acrobatics and circus arts. They are designed for poses, spins, strength-based moves and dynamic combinations above the ground.

Showing all 2 results

sort by:

Aerial Hoop (Lyra)

Frequently Asked Questions

About Aerial Hoops

1. Is This Hoop Safe?

Yes. The hoop meets the requirements of PN-EN 913+A1:2022-02 for gymnastic equipment safety and testing. Single-point hoops are additionally tested and certified by TÜV Nord.

Key safety features

  • min. 1-tonne breaking strength
  • Safe working load: up to 143 kg
  • 27 mm steel tubing with 3 mm wall thickness
  • Tested by professional aerial schools
  • Suitable for beginners, intermediate, and advanced users

Always use the hoop with correctly rated rigging equipment and professional installation.

2. What Equipment Do I Need Besides The Hoop?

Minimum items to get started safely:

Essential:

  • ceiling mount (heavy-duty, load-rated)
  • crash mat (at least 5% of suspension height thick)
  • safe practice space (clear floor area with spotter)
  • rigging hardware: carabiner, round sling or adjustable strap (for easy height changes)

Optional:

  • swivel
  • velvet sling
  • freestanding rig (if you can’t install ceiling mount)

3. What Do I Need To Install a Hoop At Home?

To install an aerial hoop safely, you will need:

  • A concrete ceiling, structural steel or wooden beam, suitable wooden joists, or a professional aerial rig capable of supporting at least 500 kg per attachment point.
  • Proper ceiling anchors, hooks, or a rigging plate designed and rated for dynamic loads.
  • Locking carabiners rated to at least 22 kN.
  • A strop or extension strap, if needed to adjust the hanging height.
  • A structural engineer’s assessment to confirm that the installation point can safely withstand the expected dynamic forces.

Never install an aerial hoop on a suspended ceiling, plasterboard, false ceiling, or an unverified structural element.

4. How Do I Install an Aerial Hoop?

Aerial hoop rigging must be installed only on a verified structural anchor point or a purpose-built aerial rig. If there is any doubt about the ceiling, beam, fixings, or equipment, use a qualified aerial rigger or structural engineer. Professional aerial-sports guidance likewise recommends competent riggers for human-load equipment.

Basic rigging order
From the ceiling or rig down:

  1. Certified ceiling mount or freestanding aerial rig
  2. Locking carabiner
  3. Aerial swivel, if spinning is required
  4. Rated round sling or extension strap
  5. Second locking carabiner
  6. Aerial hoop

A swivel is optional, but it allows the hoop to rotate freely and should never be blocked when in use.

Before training

  • Check that every carabiner is fully closed and locked.
  • Inspect the mounting point, hoop, slings, swivel, and connectors before every use.
  • Place a suitable aerial crash mat directly beneath the hoop.
  • Test the setup gradually before using it for full training.
  • Never train alone; use a qualified instructor or spotter, especially when learning new skills.
  • Do not use unverified DIY ceiling fixings, suspended ceilings, or ordinary household hardware.

For home installations, a professional assessment of the structure and rigging point is strongly recommended.

5. What Is the Right Hoop Size for Me?

Choose your hoop size using one of the measurement methods below. For the most comfortable fit, base your choice on your own measurements rather than height alone.

How to measure:

  • Standing measurement: Measure from the top of your hip to the floor. Add 5 cm and round up to the nearest available hoop size.
  • Seated measurement: Sit upright on a chair and measure from the seat to the top of your head. Add 12–15 cm and round up to the nearest available hoop size.

Available hoop sizes
75 | 80 | 85 | 90 | 95 | 100 | 105 | 110 cm

Suggested sizes by height

Hoop size Suggested user height
110 cm 180 cm and above
105 cm 172–180 cm
100 cm 164–172 cm
95 cm 156–164 cm
90 cm 148–156 cm
85 cm 135–148 cm
80 cm 125–135 cm
75 cm Under 125 cm

Note: These height ranges are general recommendations only. For the best fit, always choose the size based on your personal measurements.

6. Which Handle Option Should I Choose?

Choose the hoop style based on your experience, preferred movements, and whether you want more rotation or more stability.

Hoop style Key features Best for
Single-point hoop One attachment point at the top. Rotates freely when used with a swivel and is the most versatile option for general aerial training. Beginners and all-round training
Double-point hoop Two attachment points provide greater stability and control. The hoop has less free rotation, making it useful for certain poses, transitions, and routines. Intermediate aerialists who prefer more control
Zero-point hoop No built-in attachment points; the rigging strap wraps directly around the hoop. This setup offers fluid movement and can rotate freely when correctly rigged with a swivel. Advanced aerialists with strong technique and rigging knowledge

Recommendation: For a first aerial hoop, a single-point hoop is usually the most versatile and beginner-friendly option.

7. Do I Need a Taped or Untaped Aerial Hoop?

Taped hoops

Benefits:

  • Enhanced grip — extra friction helps you maintain a secure hold, even with sweaty hands.
  • Better control during dynamic movements.
  • Protective padding — tape adds cushioning and can reduce pressure on the hands, wrists, and body.
  • Ideal for moves requiring a strong grip, such as ankle hangs, foot hangs, heel hangs, and neck hangs.
  • Best for most aerialists, especially those practising challenging positions or drops.

Things to consider:

  • More maintenance is required — the tape can wear over time and may need replacing every 1–2 years, depending on use.
  • New tape may feel sticky at first and can leave slight adhesive residue. Dusting it with chalk may help reduce stickiness.
  • Tape friction on bare skin can take time to get used to.
  • Protective clothing may help prevent friction burns and calluses on the hands, wrists, and legs.

Untaped hoops

Benefits:

  • A smoother feel on the hands and skin, especially for burlesque or performance-style training.
  • Less friction on bare skin during regular contact with the hoop.
  • Gentler on the hands and may cause fewer calluses than a taped hoop.
  • Easier to clean, with no tape to maintain or replace.
  • Best for performances with exposed skin, aerial dance, and burlesque-style movements.

Things to consider:

  • Lower grip compared with a taped hoop.
  • Some moves, including neck hangs, heel hangs, and foot hangs, may be more difficult and require greater control.
  • Sweaty hands can make the hoop harder to grip.
  • More grip strength and experience may be needed for dynamic movements.

Not sure which option to choose? Speak to your instructor or try both styles where possible. Many aerialists prefer taped hoops for regular training, while untaped hoops are often chosen for their smooth feel and appearance.

8. How Do I Tape My Aerial Hoop?

What You Need

  • High-quality aerial or athletic cloth tape
  • Scissors
  • Chalk
  • Rubbing alcohol or a suitable cleaning product

Before You Start

Clean the hoop thoroughly to remove dust, oil, and residue. Allow it to dry completely before applying the tape.

Taping Method

  1. Start at the bottom of the hoop.
  2. Wrap the tape upwards in a slight spiral, overlapping each layer by approximately one-third of the tape width.
  3. Continue to the top of the hoop.
  4. Start again at the bottom and tape the other side in the opposite direction until you reach the top.

This two-part method is preferred by many aerialists because it helps prevent the tape from rolling or lifting at the edges during use.

After Taping

  • Keep the tape under gentle tension and smooth it as you wrap to avoid wrinkles and air bubbles.
  • Lightly dust new tape with chalk if it feels sticky. Excess adhesive can sometimes come through the cloth tape, especially when it becomes warm during training.
  • Inspect the tape regularly and replace it if it becomes loose, worn, dirty, uneven, or starts peeling.

9. Maintance: How Do I Keep My Hoop Safe?

Regular inspections and proper care are essential for safe aerial hoop training.

Before Each Practice

  • Check all carabiners, connectors, and rigging hardware for visible damage.
  • Inspect the carabiners, swivel, ceiling mount, and attachment points for cracks, deformation, corrosion, sharp edges, or excessive wear.
  • Do not use the hoop or rigging equipment if any damage, unusual movement, or wear is found. Replace the affected item or have it inspected by a qualified professional.

Regular Care

  • Wipe the hoop down after each practice to remove sweat, chalk, and hand residue.
  • Store it indoors in a dry place.
  • Check the hoop regularly for scratches, dents, cracks, or rust spots.
  • Inspect the attachment points where the rigging hardware connects to the hoop.

With regular inspection and simple care, the hoop can remain in good condition for many years of training.

10. Can I Return It If It Doesn’t Work Out?

Yes. You have a 14-day right to return your order and receive a refund.

Return Conditions

  • You may return the product within 14 days of receiving it.
  • The product may be inspected and handled only as necessary to check its nature, characteristics, and function—just as you would in a physical shop.
  • If the equipment shows signs of use, wear, marks, damage, or other handling beyond what is necessary for inspection, its value may be reduced.
  • To start a return, simply contact us by email.
  • Return shipping costs may apply, depending on the return policy and the reason for the return.